Instance is a VM (Virtual Machine) that operates in IXcloud. You can choose a proper server from 1Core 1GB to 16core 32GB and you can launch it in 2-3 minutes.
*Process
You can choose size and image OS of an instance; a key pair for security
Before creating instance, you have to create a key pair and network first.
Please refer to ☞ 'Access and security componemts of Instance' and ☞ 'Build and manage a network'.

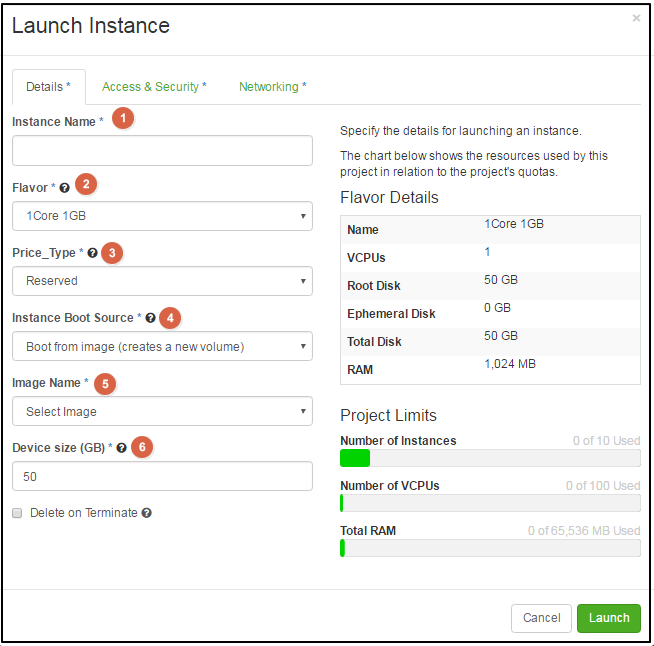
Details tab
![]() Instance Name: Type an instance name.
Instance Name: Type an instance name.
![]() Flavor: Choose the size of image to launch.
Flavor: Choose the size of image to launch.
![]() Price Type: Select the price type ‘On demand/Reserved’
Price Type: Select the price type ‘On demand/Reserved’
![]() Instance Boot Source: Select from ‘boot from volume’/ ‘boot from image’/’boot from volume snapshot’.
Instance Boot Source: Select from ‘boot from volume’/ ‘boot from image’/’boot from volume snapshot’.
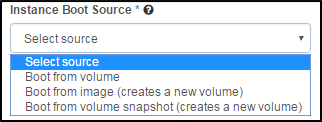
Boot from volume
You can choose the volume on the list at the bottom.
Boot from an image (creates a new volume).
Select the image on the ‘image name’ list at the bottom and specify the name with size to create a new volume.
Select the check box at the bottom if you want to terminate volume when you have finished instance.
Boot from volume snapshot (creates a new volume).
Select a snapshot on the list at the bottom.
Select the check box at the bottom if you want to terminate a volume when you have finished instance.
![]() Image name: You can choose an OS image that you want to boot.
Image name: You can choose an OS image that you want to boot.
![]() Device size: You can choose the size of volume you want to boot (Units 50GB).
Device size: You can choose the size of volume you want to boot (Units 50GB).
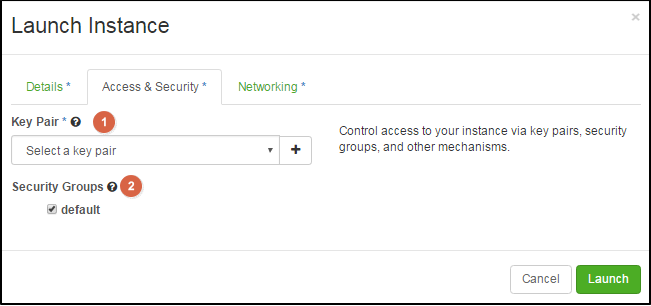
Access & security tab
![]() Key Pair: Choose from the created key pairs for authentication
Key Pair: Choose from the created key pairs for authentication
![]() Security Groups: You can enable the security group being allocated to instance.
Security Groups: You can enable the security group being allocated to instance.
- Security group performs functions like a firewall, defining network traffics to an instance.
If you have not created security groups, only default security group can be assigned.
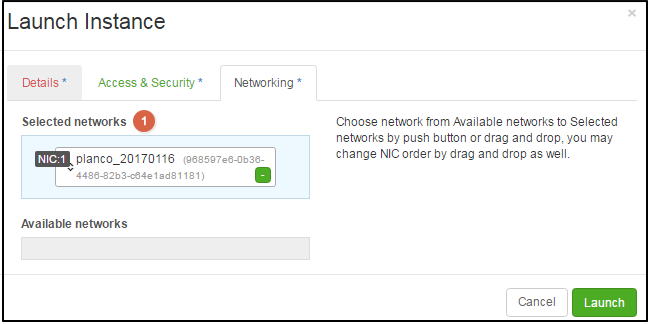
Networking tab
![]() Selected network: Choose a network from the available networks.
Selected network: Choose a network from the available networks.
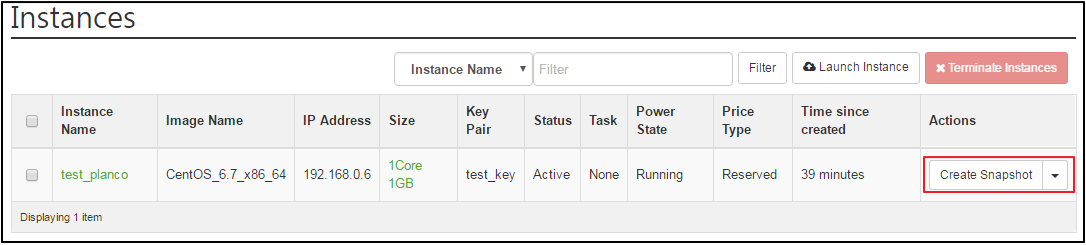
 button, then a new instance,test_planco, appears.
On the instance page you can see the name, image name, IP address, size, details, etc.

With this statistics you can check the usage of instance and present state of every month about each project .
 button after Project > Compute > Overview.
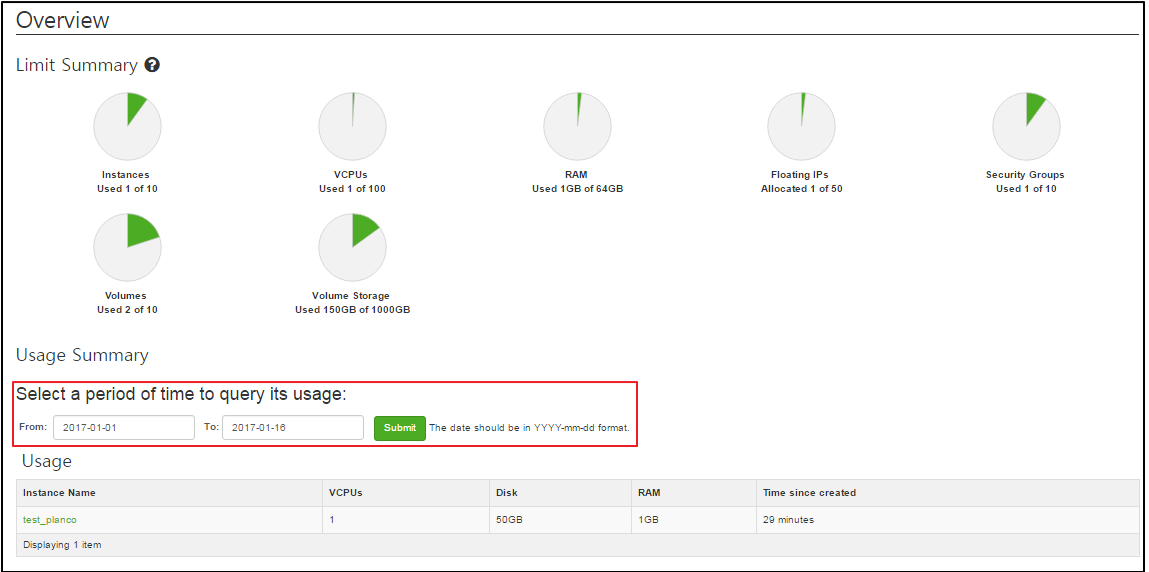
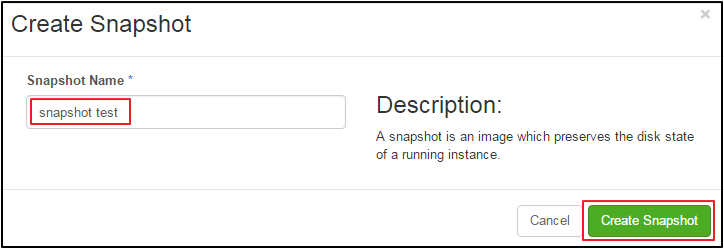
Instance snapshot can save a specific point as an image file; you can return to the point anytime.

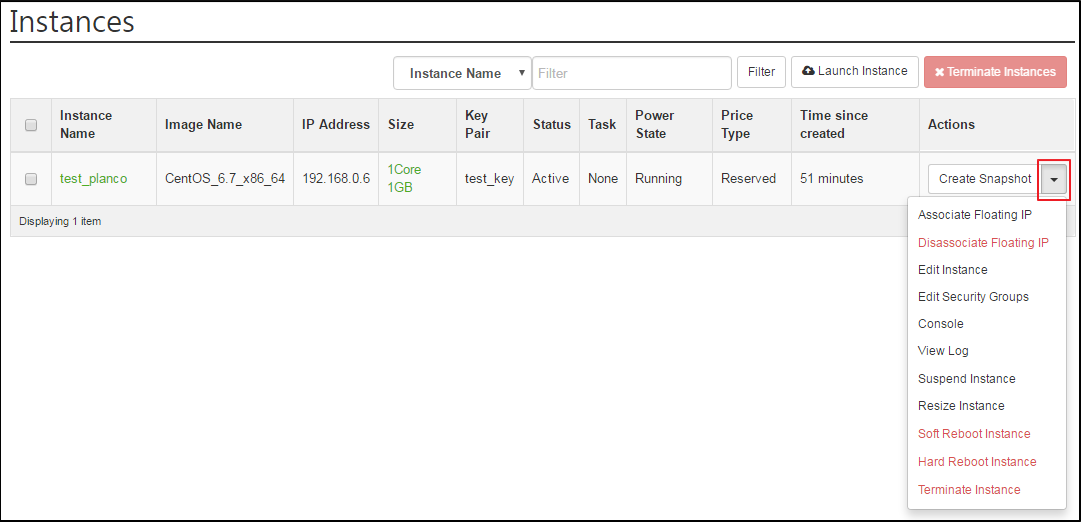
Users can change the size of an instance or rebuild each instance and even stop or terminate instance.
|
KINX 21F, Gangnam Building, 396, Seocho-daero, Seocho-gu, Seoul, KOREA Service Inquiry : 02-526-0900(Press 1) Technical Inquiry : 02-526-0900(Press 2) |
|
|
|


