Create and manage Supreme volume
IXcloud utilizes Supreme volume which is advanced one.
This volume operates advanced performance and ability suitable for enterprise sized application.
One volume is available up to 12,000 IOPS. It protects from server faults and also can minimize the effects from hardware errors.
*Process
- How to create a volume
- How to connect a Supreme volume to an instance
- How to disconnect from an instance
- How to create a volume snapshot
- How to edit a volume
- How to delete a volume
1. Create a volume
- In cloud management console Click
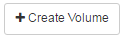 button after Project > Compute > Volume.
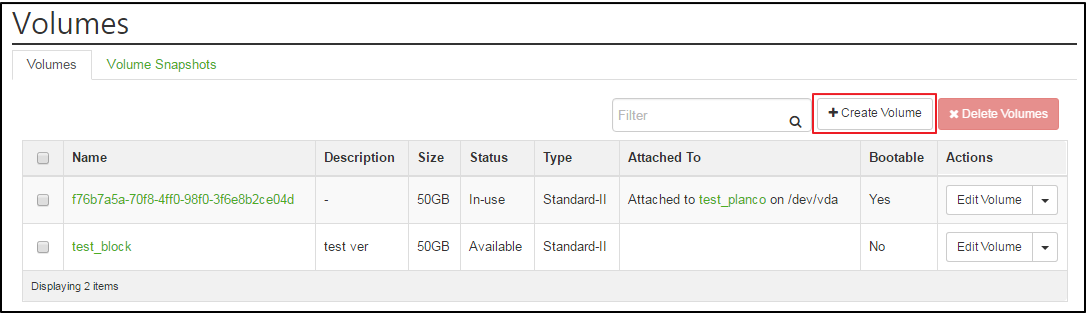
- 'In the ‘Create Volume’ dialog box, do the following:
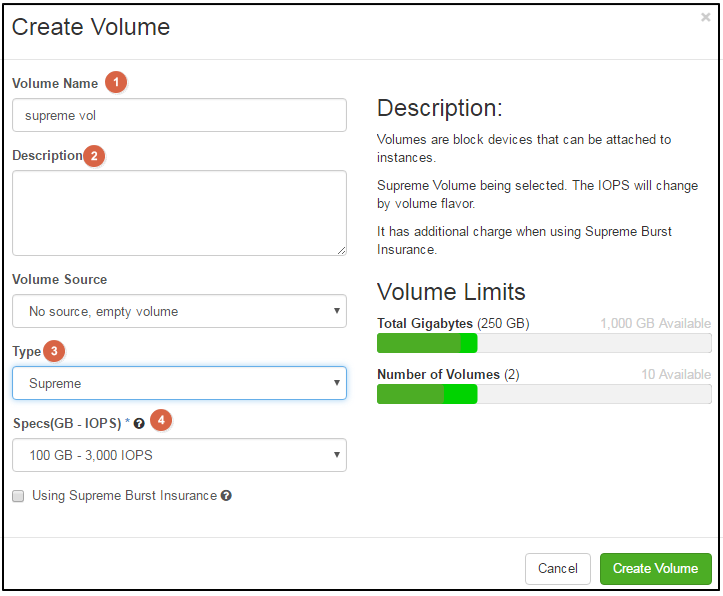
 Volume name: specify volume name.
 Description: it’s optional. Type a brief description.
 Type: Select ‘Supreme’.
 Size:(GB –IOPS): Choose a suitable IOPS.
- Click
 button, then you can see test_block has been created on the dashboard.

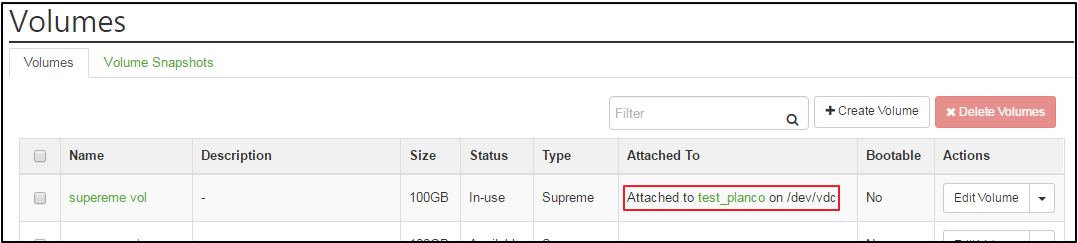
2. Connect Supreme Volume to an instance
To connect to instance, you need at least one volume. You can connect one volume to an instance in a time.
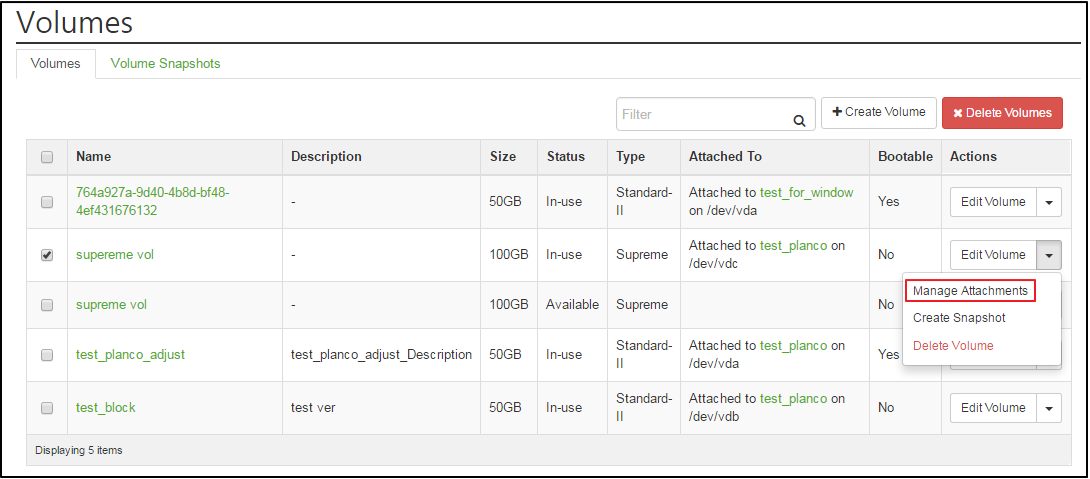
- Click
 button after Project > Compute > Volume. Then, click “Manage attachment’.
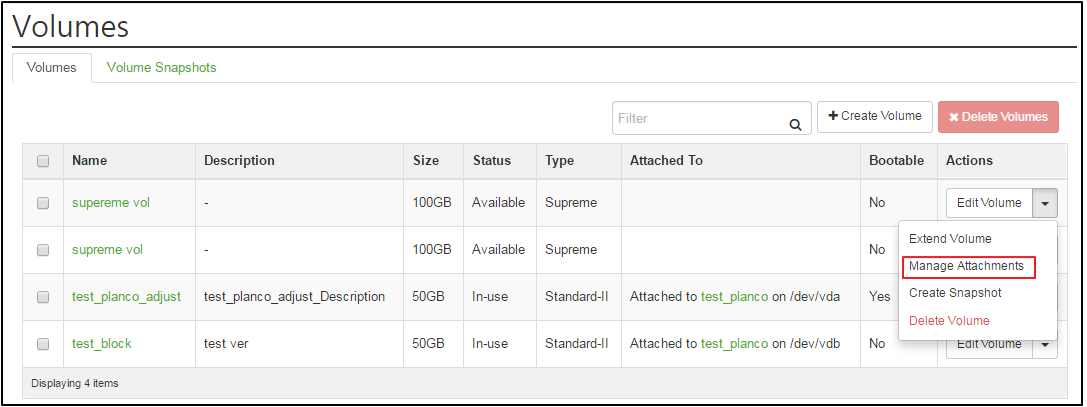
- In the ‘Mange Volume Attachments’ dialog box, choose an instance to attach to.
*The original device name can be different with the chosen name according to a hypervisor setting.

- Click
 button. You can see the supreme volume, test_bock, has been attached to the test_planco instance.
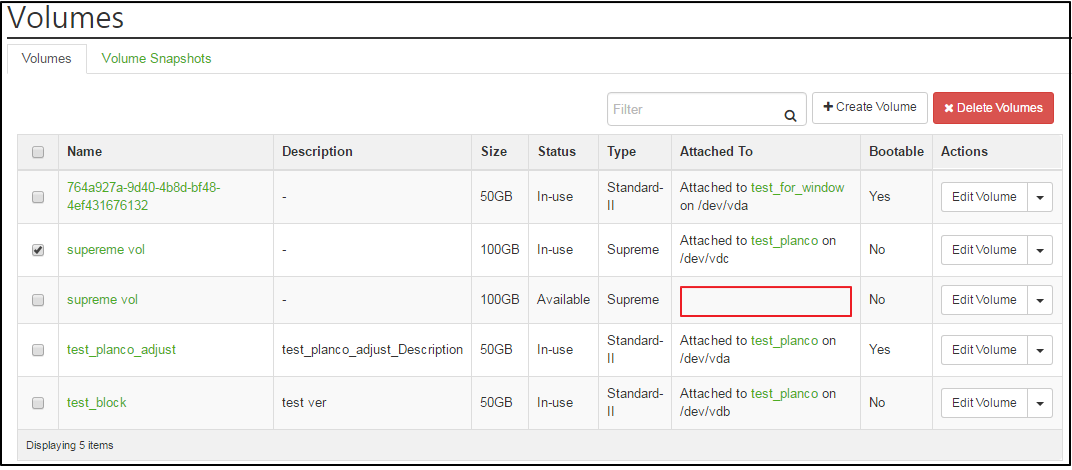
3. Detach a volume from an instance
- Click
 button of the volume you want to detach after Project > Compute >Volume, then click ‘Manage attachment’.
- In the ‘Manage Volume Attachments’ dialog box, click
 .
.
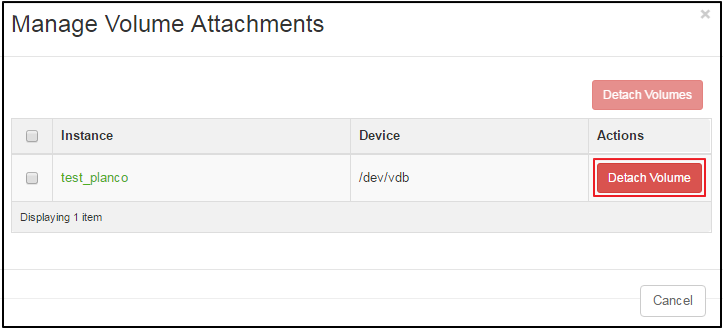
- Then you can see the Supreme volume has been detached from an instance.
4. To create a volume snapshot
- Click
 of the volume in which you want to create a snapshot, then click ‘Create snapshot’ after Project > Compute > volume.
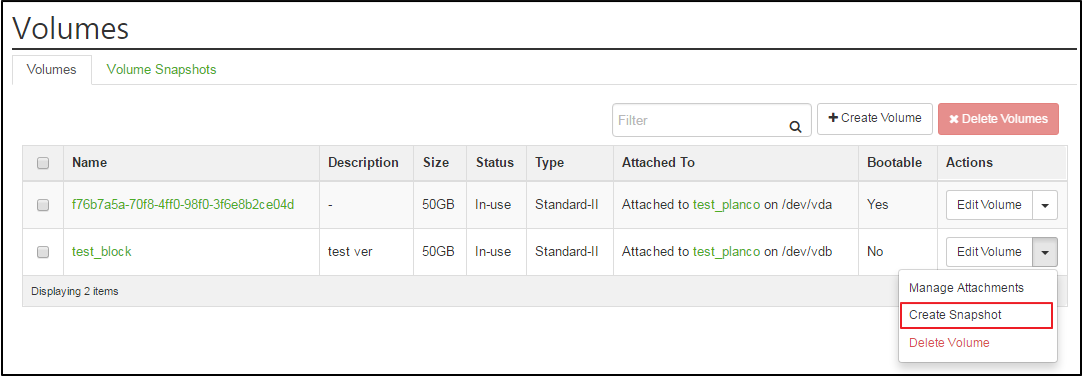
- In the ‘create volume snapshot’ dialog box, type Snapshot name and Description.
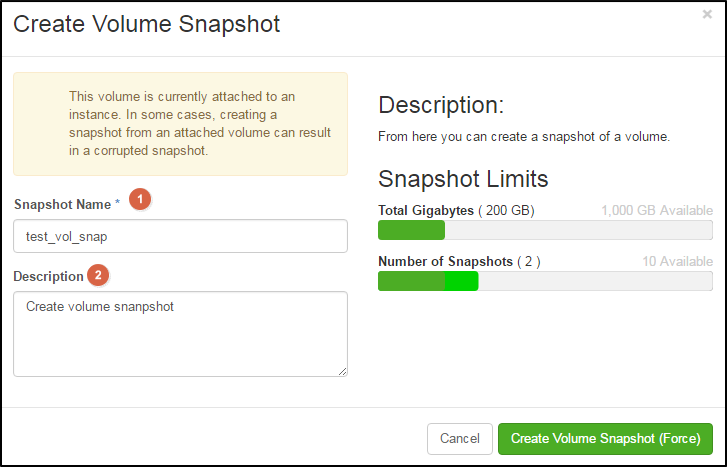
- Click
 button.
On the Volume snapshot tab, you can see the new snapshot: test_vol_snap.

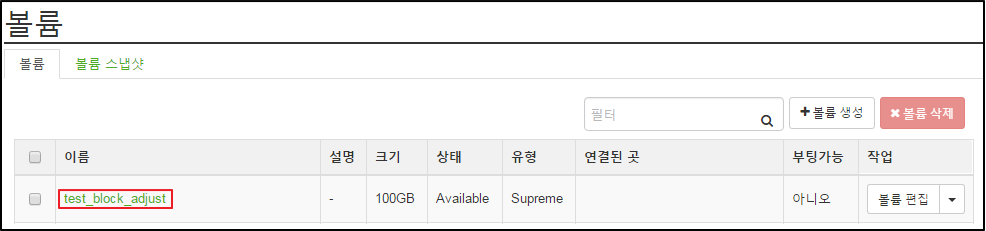
5. To edit volume
- Click
 button of the volume you want to edit after Project > Compute > volume.
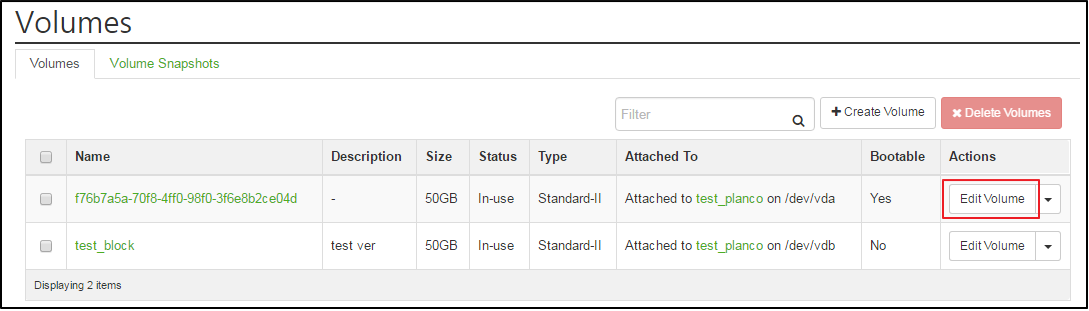
- Modify the name and description in the ‘Edit Volume’ dialog box.
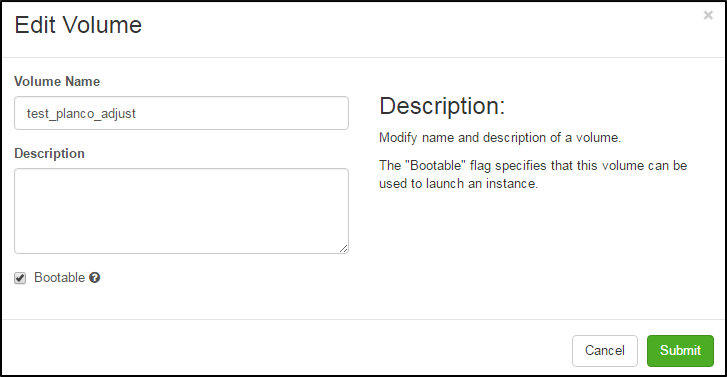
- Click
 button.
You can see the volume name has been changed from text_block to text block_adjust.
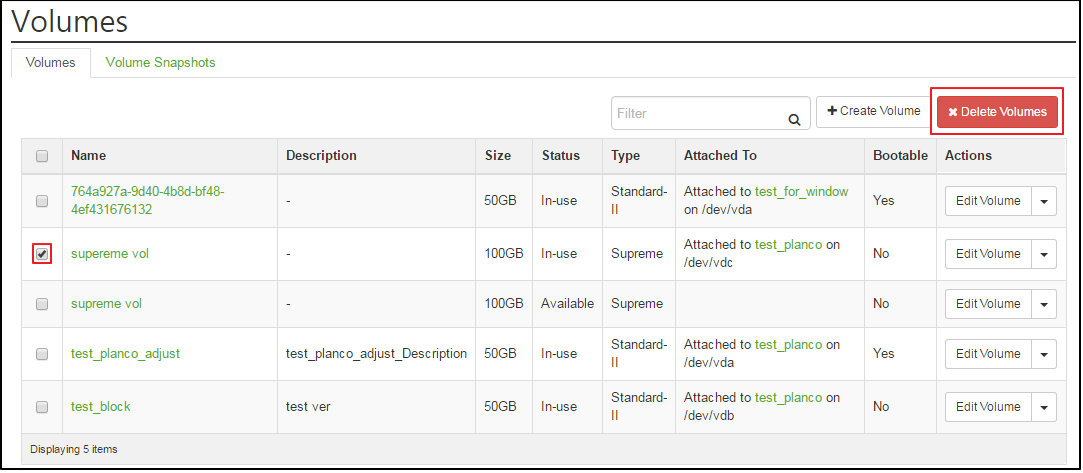
6. Delete a Volume
Even if you delete an instance, the connected volume data will not be damaged.
- Click
 button after Project > Compute > Volume.
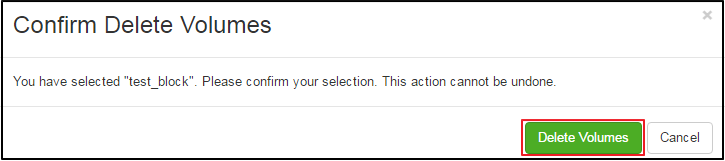
2) You can delete successfully when you click  in the ‘Confirm Delete Volume’ dialog box.

|
KINX
21F, Gangnam Building, 396, Seocho-daero, Seocho-gu, Seoul, KOREA
Service Inquiry : 02-526-0900(Press 1)
Technical Inquiry : 02-526-0900(Press 2)
|

|

|

|